Fallshirmjäger
- Lieutenant with 2 men
- Medic with 2 men
- FOO with 2 men
- Medium Mortar
- 2 full infantry squads with 2 MG's and assault rifle in both of them
Red Devils
- Lieutenant with 2 men
- Medic with 2 men
- FOO with 2 men (free)
- Medium Mortar
- Vickers MG
- Sniper team
- 2 full infantry squads, 4 SMG's and Bren
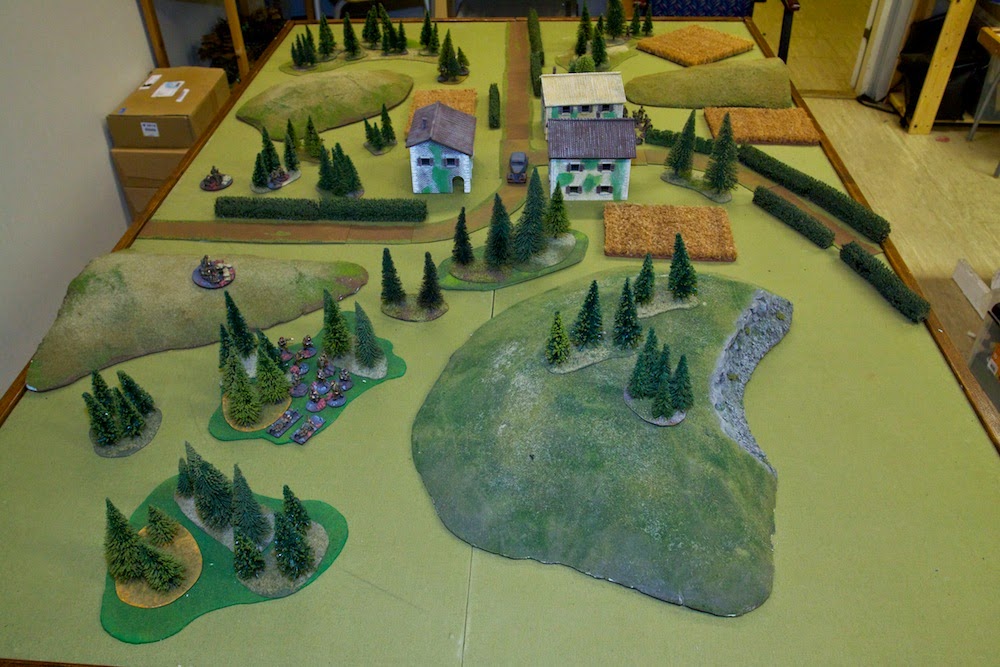
Germans deployed one rifle squad next to the buildings and the FOO in the far end of the table out of harms way (which we actually messed up as the defending units should have been left within 6" of the objective).
I deployed my other rifle squad into the woods on one side of the small village, with the MG team covering them from a nearby hill and the medium mortar deployed behind some trees close to the village. Finally the sniper team was deployed on the other side of the village in cover ready to harass anything that tried to come from that way.

I moved my infantry squads in cover towards the objectives while harassing the German rifle team with sniper fire. My mortar teams spotter moved quickly towards the buildings to take up positions to call fire upon any Germans advancing on the buildings. At the same time the artillery observer moved up on my left flank with the same intentions in mind.


After getting into position my spotter immediately called fire upon the German infantry squad out in the open. They had been unable to move due to unsuccessful command rolls thanks to the pinning cause by the preliminary bombardment. Luckily my first shot landed straight in the middle causing a casualty and additional pin markers.

At the same time my reserve rifle squad had managed to move up to the same building occupied by the mortar spotter and were ready to move in to cover the other squads advance.

A german rifle squad moves into the objective building and immediately opens fire on my artillery observer who was hiding in a field close by. Luckily only one orderly was killed despite two MG's and a few riflemen opening up on them.


The other German squad finally rallies thanks to the shouts of their commander and moves into cover behind the final unoccupied building.

Things are starting to look bad for the Germans as my Red Devils start concentrated fire on them from all directions. Two squads firing with the help of my MG team on the hill manage to take out their NCO and both MG's and causing multiple pins which effectively put them out of the game. The rifle squad lurking in the forests moves up to finish the job by charging in the building and killing the remaining Germans and capturing the objective.


The remaining Germans move into position in the last house in the village, while their mortar lands a shell in the objective building. With some lucky saves the Red Devils come through unscathed once again.

In the final turn my artillery strike comes in killing of a few Germans and adding 2 to 3 pin markers to all German squads. This meant that they couldn't really put up a fight anymore and we decided to end the game without playing the last round through.

The game ended with a clear victory for the British with only 2 dead and the objective safely in their hands. The Germans lost a complete rifle squad with the other one taking quite a beating in the end also. Most of their units had multiple pin markers on them and they were deemed ineffective.
My MG and sniper teams didn't really succeed in causing much damage, but they were enough of a threat on both flanks to hinder the German movement. With the British special rules the preparatory bombardment proved devastating as did the artillery strike that my free artillery observer ordered. Good use of cover and teams supporting each other really did win the game for me as I managed to tackle the highly deadly German squads one at a time before they managed to move into good positions and support each other.
All in all a much more positive experience from the game than last time. More scenery really does wonders for Bolt Action as you can really use cover to advance with your teams.
Good report of the fight! Fallschirmjägers truly lost the day! Well hope they learned few things.
VastaaPoistaLet's hope that they haven't learned too much or my good old chaps have to spill a bit too much blood to reach their objectives :)
PoistaNice report, and a great looking table and armies too. Good to see the Red Devils come out on top! Cheers, Paul.
VastaaPoistaThanks Paul!
PoistaGreat looking game and write up, thanks!
VastaaPoistaThank you!
PoistaHi again. I'm nominating you for a Liebster Award, you can check out what it's all about here: http://reddogofwar.blogspot.co.nz/2014/05/private-liebster-reporting-for-duty.html
VastaaPoistaCheers, Paul :-)
Thank! This will be tricky... :O
Poista